
One of many trends making the rounds on Tik Tok is anime glass art. Following what seems like a straightforward process that anyone can follow yields results that looked like you stole an animation cell straight from your favourite anime.
Toting an assortment art supplies, we tried making our own anime glass art masterpieces!
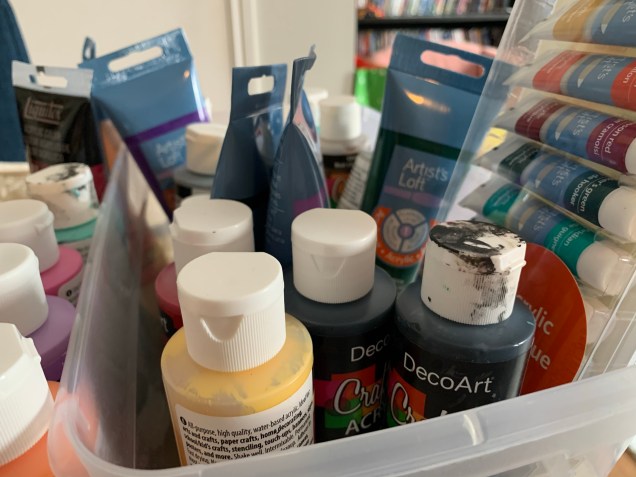
First, we needed supplies. Steff already had an assortment of acrylic paints on-hand, but we needed some other stuff to complete the job. In case you’re interested in trying this out, here’s an itemized list of stuff you’ll need. Save for the acrylic markers, you can get most of this stuff at the dollar store:
- Black acrylic markers of different thicknesses (Sharpies will smudge; don’t skimp on these!)
- Acrylic paint in an assortment of colours
- Paint brushes of assorted sizes
- Picture frames
- masking tape
- Q-Tips
- Roll of paper towel
- Glass cleaner
- Blade
- Access to a colour printer
Then it was time to get reference photos. On day one, I chose Goku. On day two, Princess Peach. I found photos of both online and brought them into a photo-editing app. Made sure they were properly sized to fit my canvas. Also, make sure to flip your image horizontally before you print it! The final image will be viewed from the side of the glass you won’t be painting on, so make sure to flip the image first.
Settling down at the table, I took the glass out of the picture frame and placed it overtop of the glass. Once the image is in position, I taped one of the sides down. This serves the dual purpose of keeping the photo in place while also allowing me to easily flip the image over when I want to review how the painting is looking from the right side.
Finally, it’s time to paint! Er, sketch. Using the acrylic markers, I filled in all of the outlines. Having markers of different thicknesses here helped a lot. Most of Goku’s lines were thin, requiring me to use our thinnest marker. Meanwhile, Peach’s outlines are very thick, making our thickest black acrylic marker a better fit for the job.
Making boo boos isn’t that big of a deal! If you wipe it off right away, it should clear with little resistance, You can use a Q-Tip for more precise removal. If the paint has had some time to dry, you can also use a blade to scrape off paint.
One weird quirk to note with the thin markers is that they don’t have the same lenience when it comes to the angle you draw on. Your marker pretty much has to be angled completely upright in order to ink the glass. Thicker markers work as you would expect, but you’ll have to develop a feel for the thin markers if you’re doing fine lines.
Painting is easily the scariest part of the process. For much of the process, mine looked awful. That’s okay. Trust the process. I promise you that what you’re painting looks much better on the proper side!
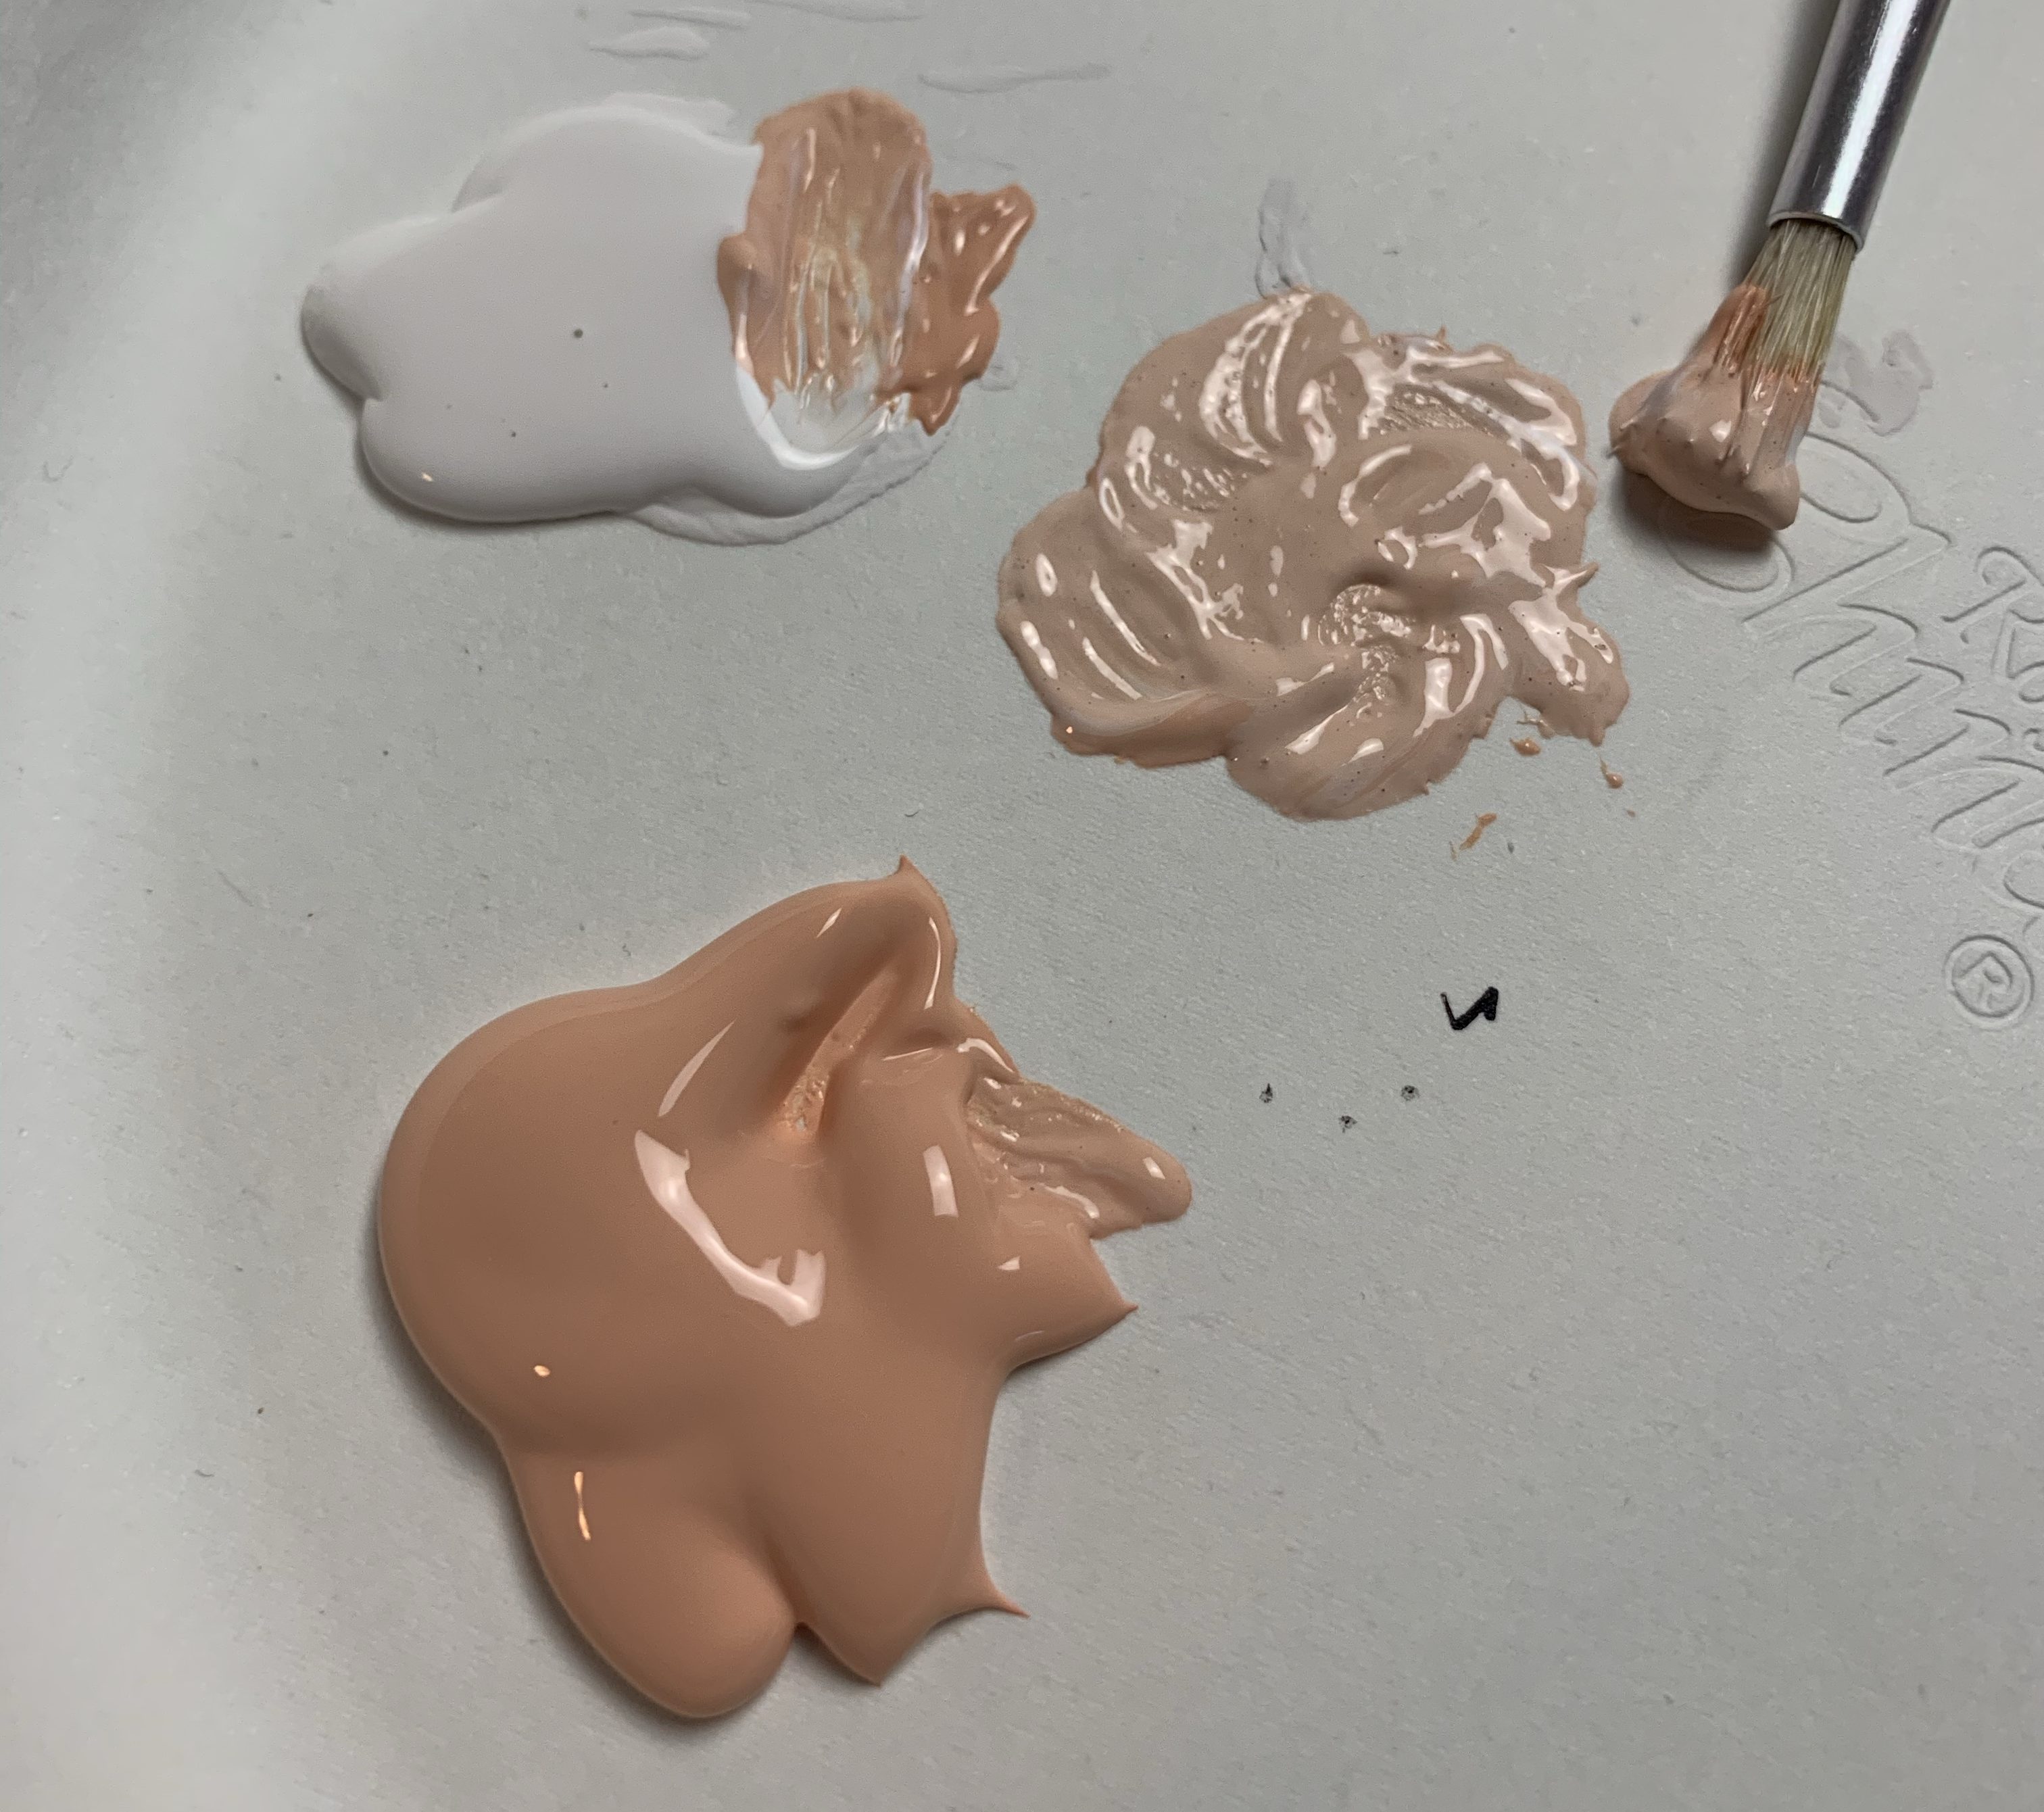
One of my big concerns going into this was colour-matching. As it turns out, being close enough is more than enough. No one will see the painting and the reference photo side-by-side, meaning they won’t notice the minor differences in shades. Get it as close as you can and then keep painting!
It’s recommended that you paint details from smallest-to-largest. Going through the process, I agree. Getting in there early with the small details makes it easier to lay the more prominent colours on thick without worrying about leaving space for minor details later.
One aspect you might want to account for is a second coat of paint. My Princess Peach painting in particular had a lot of see-through parts after the first coat. As you whip up a batch for your first coat, try and keep some aside for a second coat. If you don’t, that shouldn’t be a big deal, either. Again, get it close enough, as the full second coat will only really cover small imperfections.
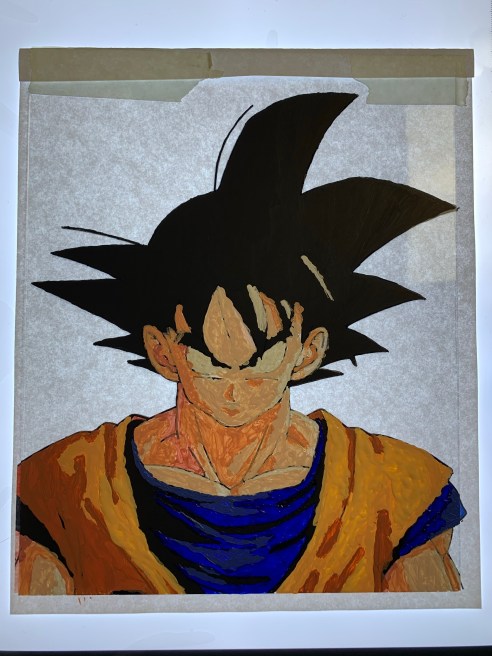
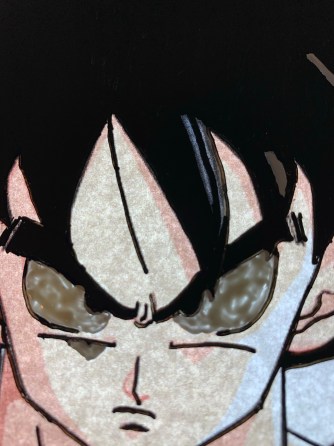
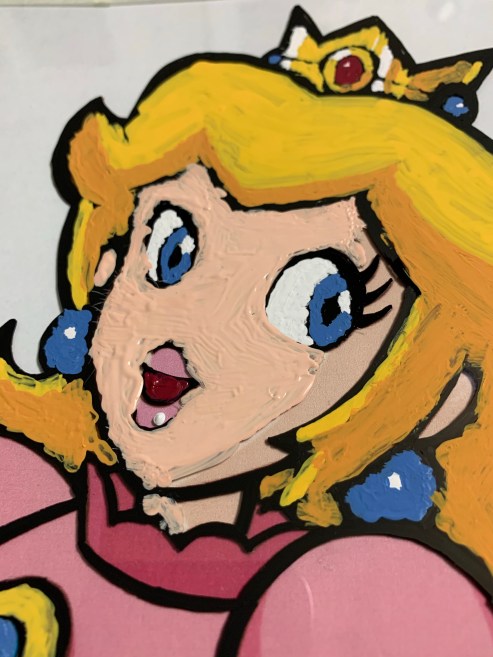
After about six hours of painting, this is what my Goku looked like from the side I was painting. Flipped around, it looked like this…

Pretty good! There are a few things I’d nitpick here, but this turned out way better than I thought it would.
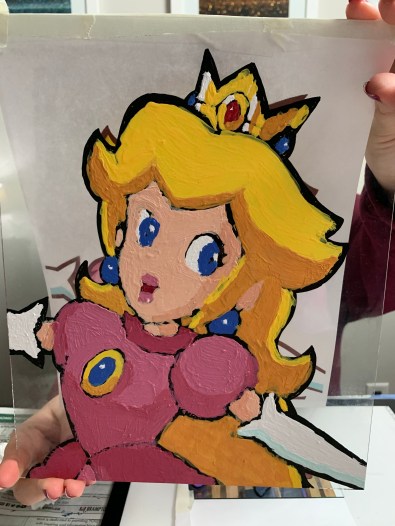
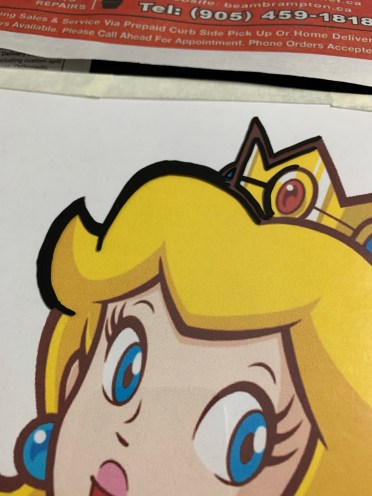
Princess Peach was painted the following day and took a bit longer than six hours. I was a lot faster at sketching her out, but spent more time painting on the second layer and getting the details right. Above is what she looks like on the side with all the paint. Below is the final product…
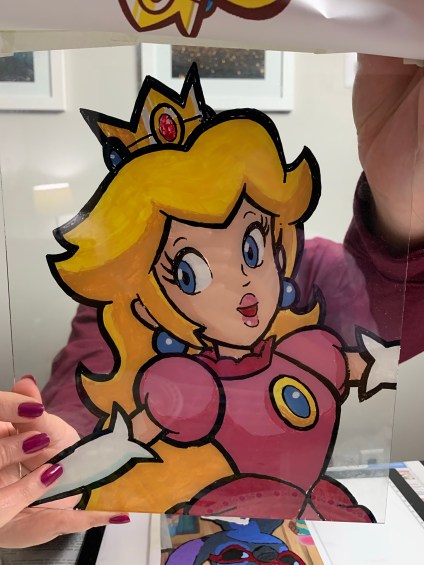
I was absolutely floored when I turned this one over! It looks incredible! Absolutely smitten by how this turned out.
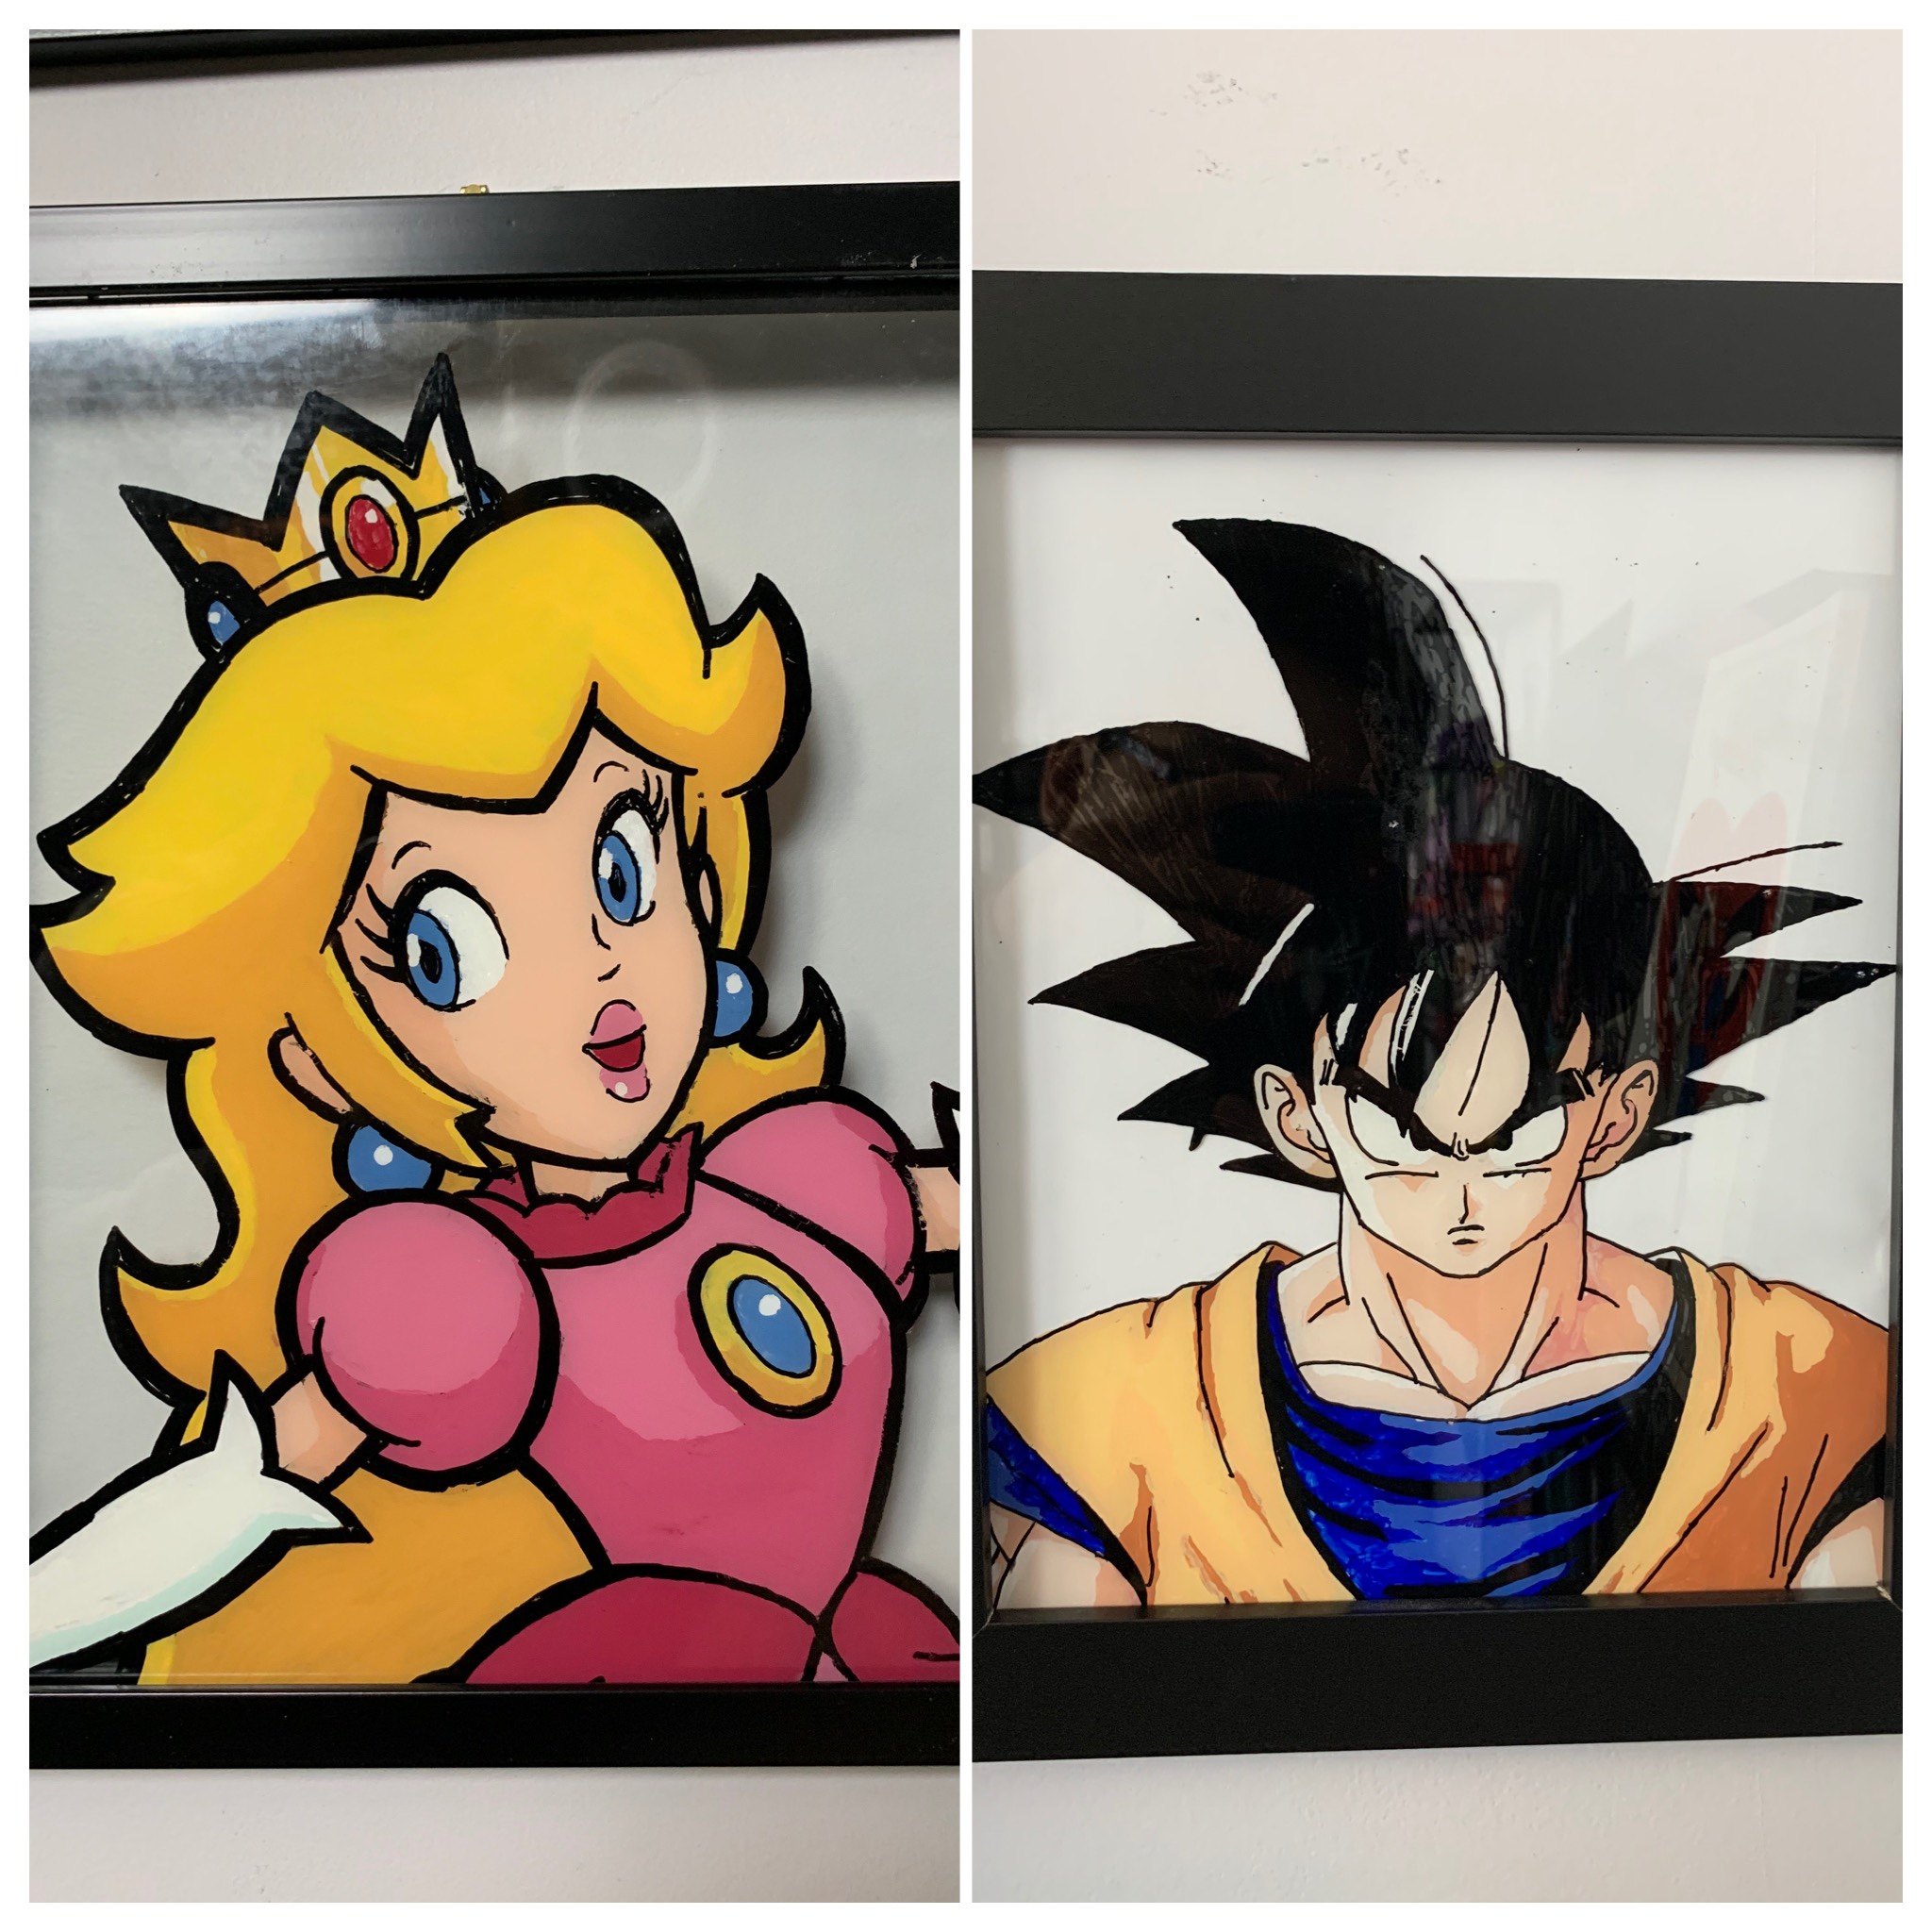 The Goku painting opened my eyes to how enjoyable the process can be. The Princess Peach painting got me more into the artistry of it all after seeing how well it turned out. Currently displaying both of these in my streaming space so that you can enjoy them too.

My most recent anime art creation is the lo-fi study girl. This one proved to be quite the challenge for multiple reasons. For one, it’s my first attempt at a full-frame image. Two, I made a number of alterations to the original image to make it easier to paint. Three, there’s actually a lot more colours in this painting than I originally anticipated. While Goku and Princess Peach took about six hours each to paint, lo-fi study girl took almost 12! Based on how it turned out, I think the effort was worth it!
Making these paintings is such a chill activity while also ending the experience with an incredible piece of art that I can’t believe I made. I’m certain if you give this a try, you can make something spectacular too!
And just in case you’re interested in following my step-by step journeys as I paint these, make sure to follow me on Instagram and follow along with my stories!
 Buy Super Mario 3D World + Bowser’s Fury Now From Amazon.com

[Purchasing through this Amazon affiliate link gives me a small commission without adding any extra cost or effort to you. Thanks for your support!]

One thought on “The Experience of Making Tik Tok Anime Glass Art”